Techniques and tips to safely cross rivers.

Source: New Zealand Mountain Safety council Bushcraft, Mountain Safety Manual 12, Revised Edition 1984

River Crossings Techniques for bushwalkers and hikers

River Crossings when hiking or bushwalking

Where to cross a river when hiking or bushwalking

Where To Cross

Hints and tips

  • Move side on to the current
  • Take small shuffling steps
  • Watch the far bank
  • Move diagonally across the river to utilize the effect of the current
  • Don’t fight the current
  • Don’t clutch logs or rocks under the water
  • Keep your boots on
  • Avoid loose, baggy clothing
  • Wear woollen or appropriate synthetic clothing next to the skin in cold conditions
  • Waterproof pack contents
  • Loosen pack shoulder straps
  • Unfasten pack waist band

If you have to cross then consider

  • Run out
  • Nature of river bed
  • Speed of river flow
  • Turbulence of the river
  • Depth of water
  • Shape of water
  • Entry and Exit points
  • Capabilities of the group
  • Coldness of the water
  • Safer alternatives

Acceptable Crossing Places

  • Shallow water (approximately thigh deep) flowing above shingly or gravelly beds and with accessible banks
  • Shallow water flowing over a boulder bed with a variable current
  • Deep and slow flowing river but not too wide

Unacceptable Crossing Places

  • High and Discoloured water
  • Excessive river flow and volume
  • Excessive river width
How to cross a river with a single pole when hiking or bushwalking

Single Pole Crossing

Points to consider

  • Pole held diagonally across the body
  • Body parallel to the direction of river flow
  • Pole positioned upstream and moved through the water
  • Pole dimensions approximately 2 metres x 6cm
  • Pack straps loosened and waist band undone
  • Maximum depth of water approximately thigh deep
  • Lean on pole using it as a ‘3rd’ leg as you move the feet forward
  • Move diagonally across and slightly downstream in an ‘arc’ fashion
  • Used for individual crossings
  • Lacks strength of mutual support methods
  • Suitable for rivers with reasonably smooth bottoms and no hazards down stream
  • Always wear footwear
How to cross a river with a long pole when hiking or bushwalking

Long Pole Crossing

Points to consider

  • Group parallel to direction of river flow
  • Strongest person oil upstream end. Also controls movement of group
  • Second strongest person on the downstream end
  • Pack straps loosened. Waist belt undone
  • Upstream arm over and downstream arm under pole. Arms linked together
  • Maximum water depth up to waist height
  • Pole diameter approximately 6-7 cm
  • Group moves diagonally across and slightly downstream
  • Used by groups of 3-6 people where river conditions are too dangerous for individual crossing
  • Very strong and stable method
  • Retreat backwards if conditions are too difficult. Do not turn around
  • Always wear footwear
How to cross a river using the mutual support technique when hiking or bushwalking

Mutual Support Crossing

Points to consider

  • Strongest person at upstream end
  • Upstream person slightly forward
  • Second strongest person at downstream end
  • Arms linked at the elbows
  • Group parallel to the current
  • Maximum river depth approximately thigh deep
  • Pack straps loosened and waist band undone
  • Used by groups of 3-5 people
  • Suitable for rivers with uneven beds
  • Groups move as a single unit
  • Always wear footwear
If you fall in, the pack can be used as a lifejacket

Recovery and Survival

If you fall in, the pack can be used as a lifejacket:

  • Lean back on pack and face downstream
  • Pack waist strap should already be undone
  • Push down on pack straps to keep pack on back
  • Keep feet in a running position and head diagonally towards the bank
  • Remove pack only if you lose control of it and/or it pushes you under. Then use it as pack float

Pack floating

  • Used where crossing is deep, river is clear of debris and river current is not a problem
  • Pack is held in front with one hand. Other hand is used (with the aid of the legs) to propel pack and self towards the bank
  • Contents of pack should be water-proofed before any pack float
  • All group members must be able to swim

River Crossings in Snow

Rivers

Fig 1A - Beward of snow banks collapsing at entry and exit points and iced over rivers

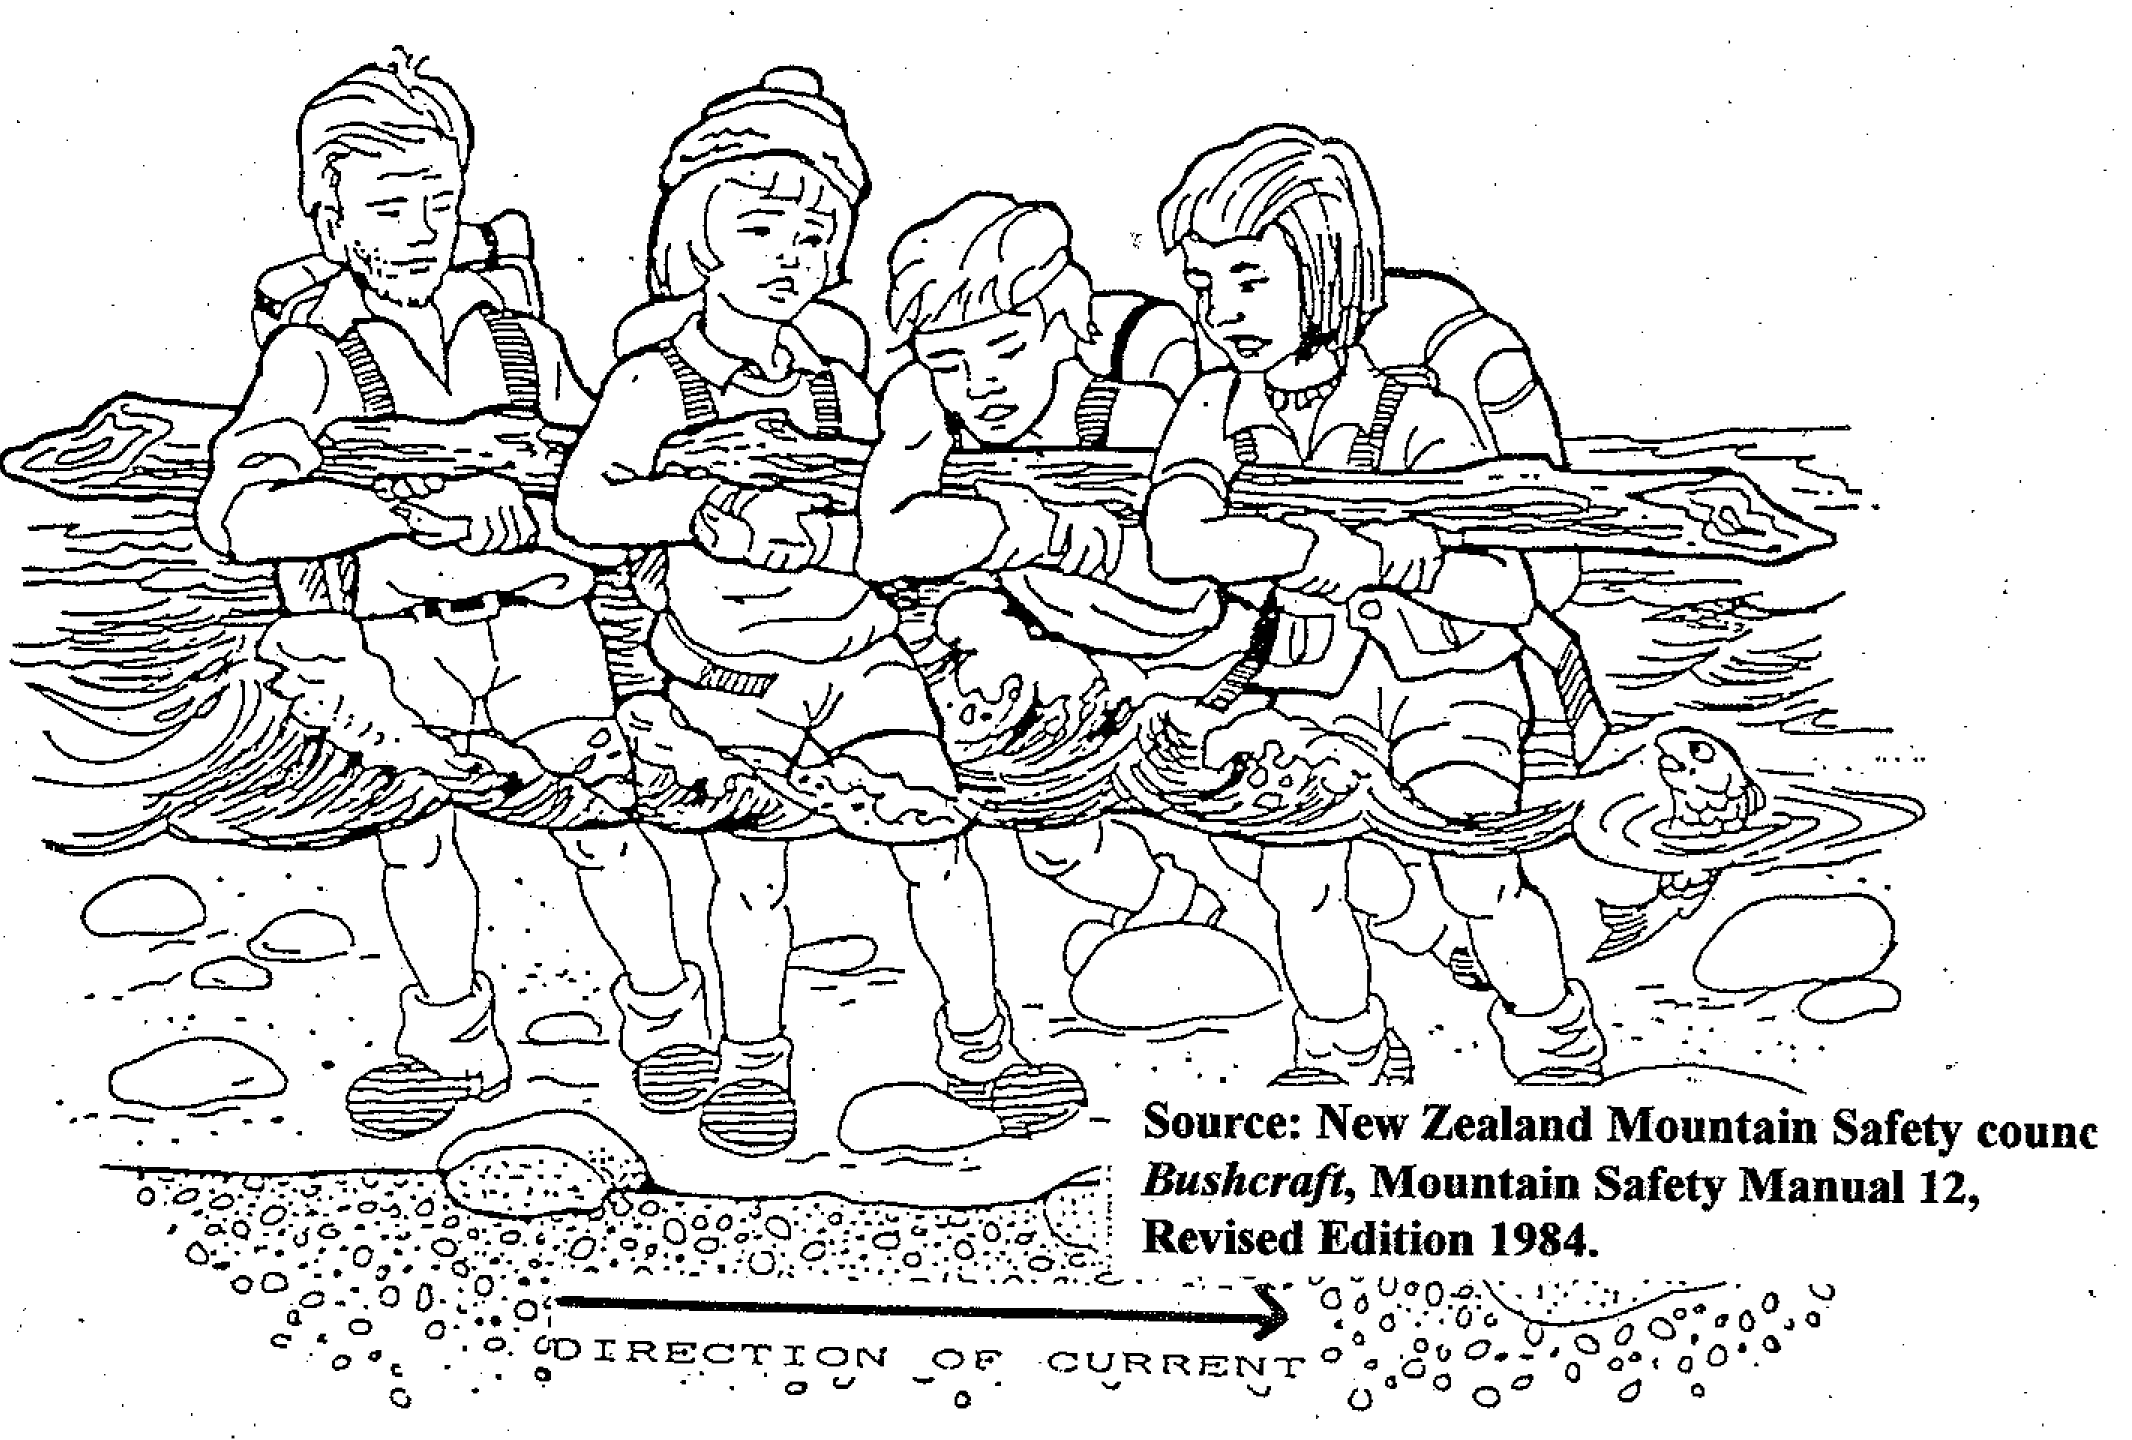
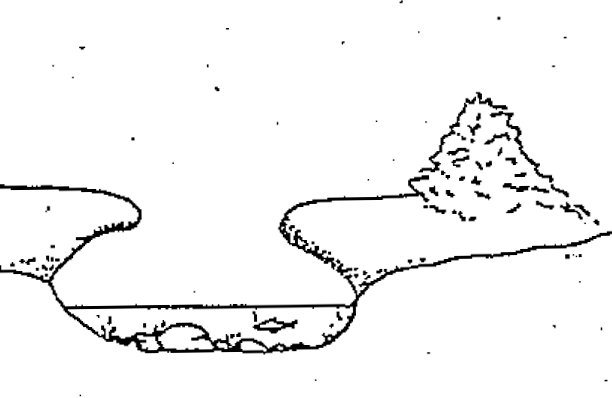
Fig 1A – Beward of snow banks collapsing at entry and exit points and iced over rivers

Fig 1B - Use stocks to aid balance during crossing

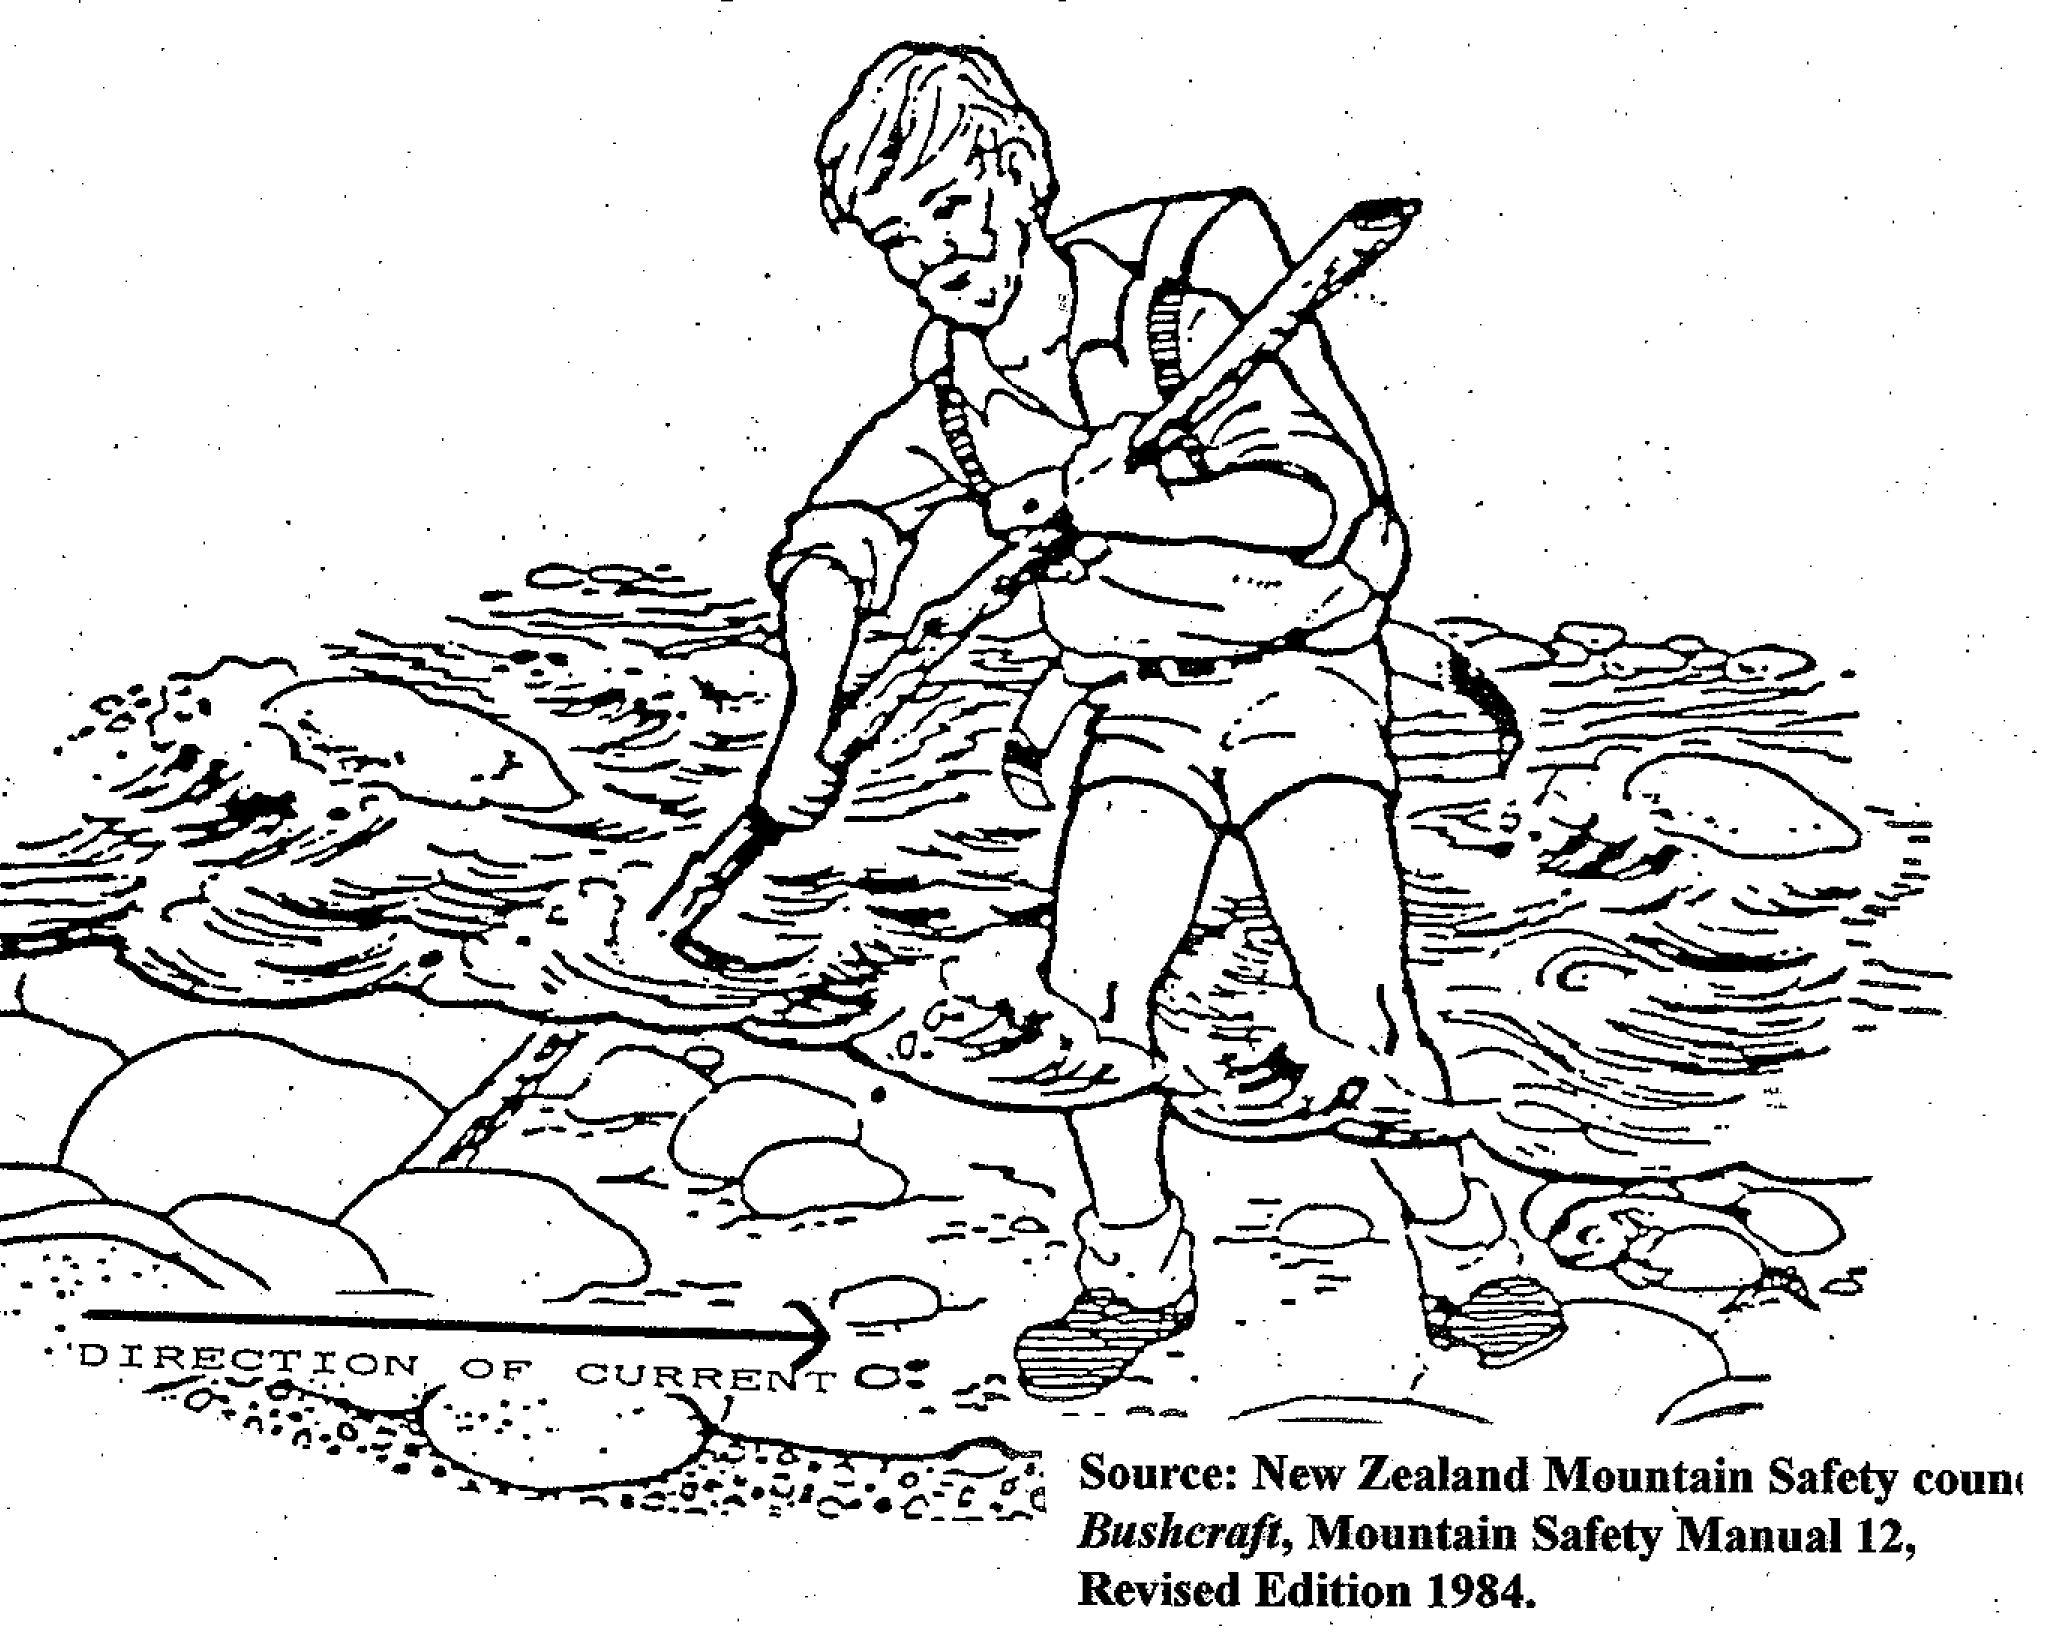
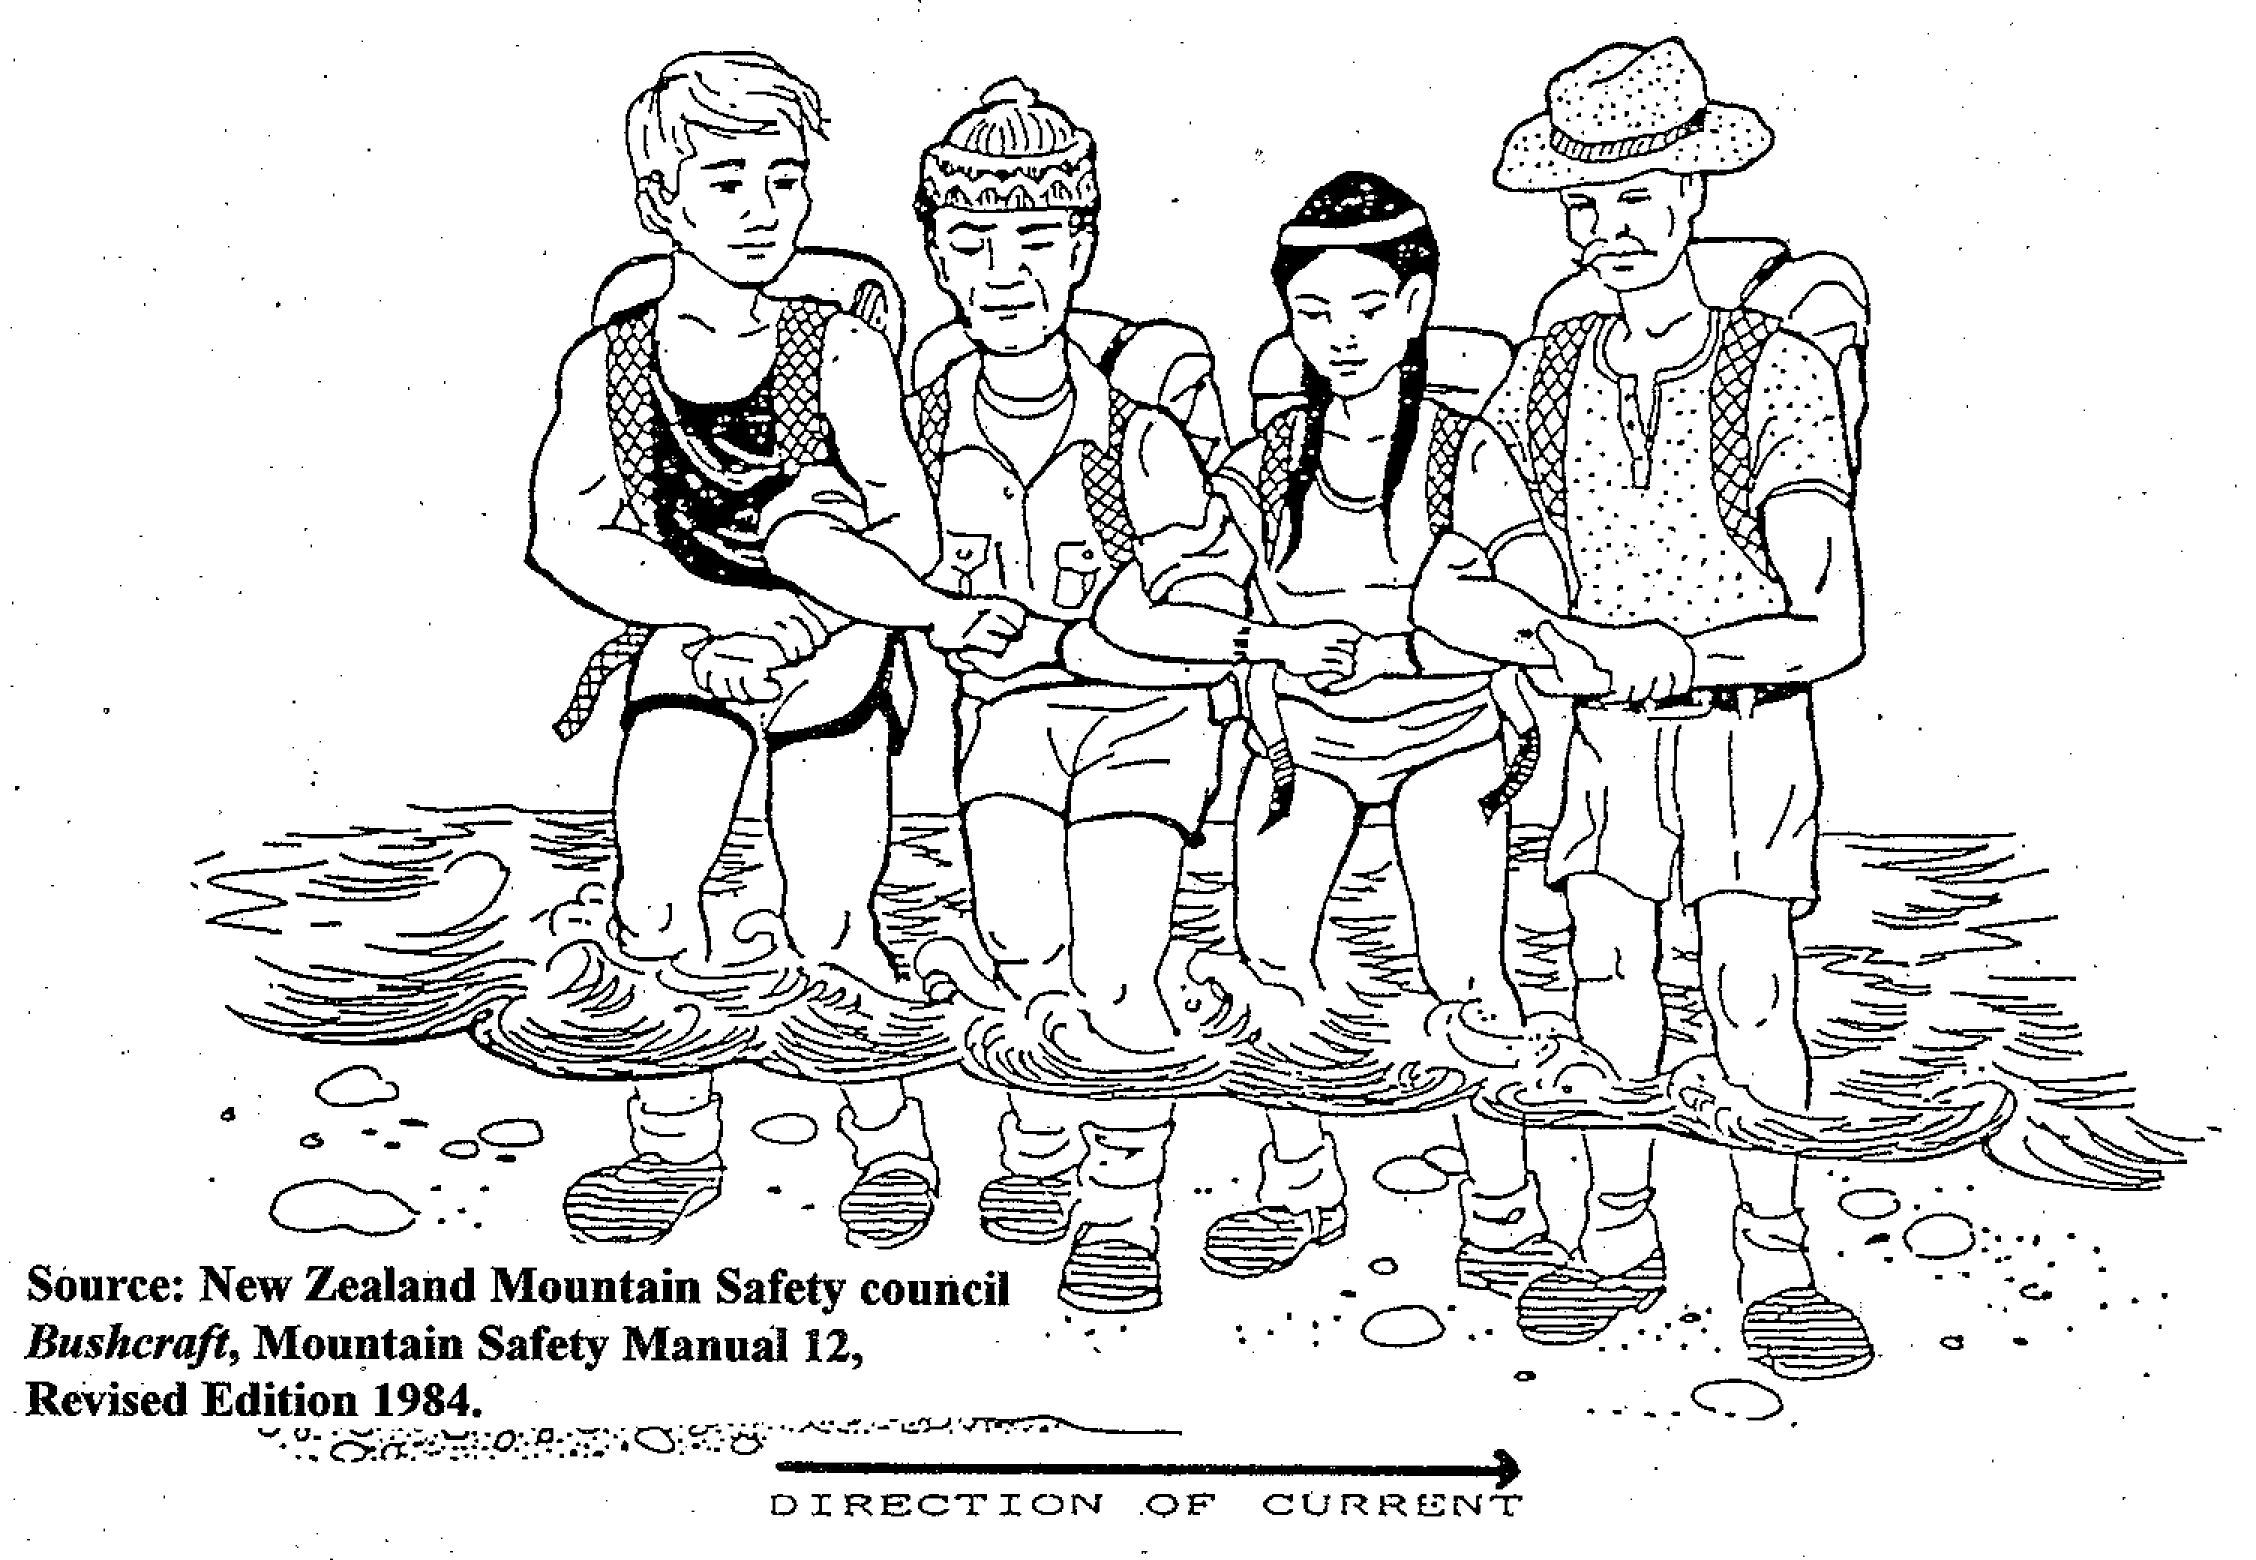
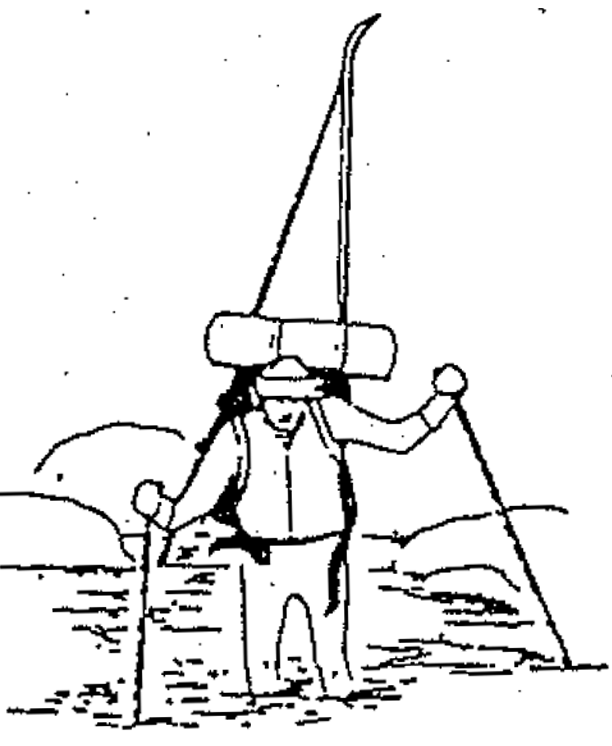
Fig 1B – Use stocks to aid balance during crossing

  • Avoid if possible, particularly deep water
  • Treat with extreme caution if you have to cross
  • Beware extremely cold water conditions, snow banks collapsing at entry and exit points and iced over rivers (Fig. lA)
  • Check entry and exit points are safe before entering water
  • Remove skis before entering water. Carry by hand or preferably attached to pack
  • Check pack shoulder straps loosened and waist strap are undone before entering water
  • Use stocks to aid balance during crossing (Fig. IB)
  • Always wear boots

Creeks

  • Consider and check the possibility of ‘jumping’ small creeks
  • If so, throw pack, skis and stocks onto other bank before jumping
  • Beware skis sliding back into creek. Use a person on opposite bank to prevent this

Snow Bridges

Fig 1C - Only one person at a time to ski across bridge

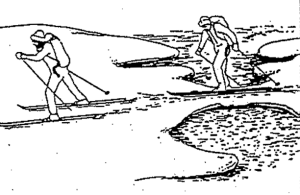
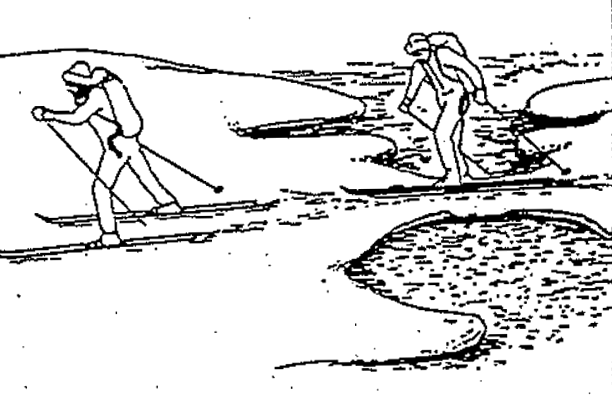
Fig 1C – Only one person at a time to ski across bridge

  • Check suitability and safeness of bridge before crossing on skis
  • Choose a bridge whose width can be spanned by the length of skis
  • If safe to cross release ski safety straps, take hands out of stock wrist straps, and undo rucksack waist band
  • Only one person at a time to ski across bridge (Fig. 1C)
  • Beware overhanging snow banks and possibility of bridge collapsing
  • Beware danger of fallen person being swept under a snow bank or a snow tunnel
Bushwalking Leadership SA